


From café-quality cold foam to silky vanilla bean syrup, some of the most irresistible treats offered in coffee shops are sometimes too out of reach for a home coffee bar. But have a little faith anyway. With a few simple tips, you can make everything from a coffee shop at home, including expert-level latte art.
Advertising
Some skilled baristas can create stunning latte art with a simple splash of milk. While it can certainly take some time to perfect this art, with a little help from a pro, anyone can do it. So if you’re dying to make latte art at home, you’re in luck. We sat down with coffee expert Mathew Woodburn-Simmonds of Home Coffee Expert to find out all about latte art, and he says the secret to the best designs lies all in the milk. “Getting the milk just right in terms of quantity, aeration and temperature is the fundamental building block you need to master to make truly great latte art,” he said.
While Matt acknowledged that the answer is obvious, steaming milk to the perfect consistency isn’t quite as easy as it seems. “Your milk should be the consistency of wet paint and well blended.” Milk with this luscious, smooth texture should blend effortlessly with espresso. It’s velvety enough to stand out and create patterns in a liquid, and it won’t be too foamy. “It’s impossible to produce latte art with dense foam on top of hot milk,” Matt explained.
Advertising
A step-by-step guide to perfect frothed milk
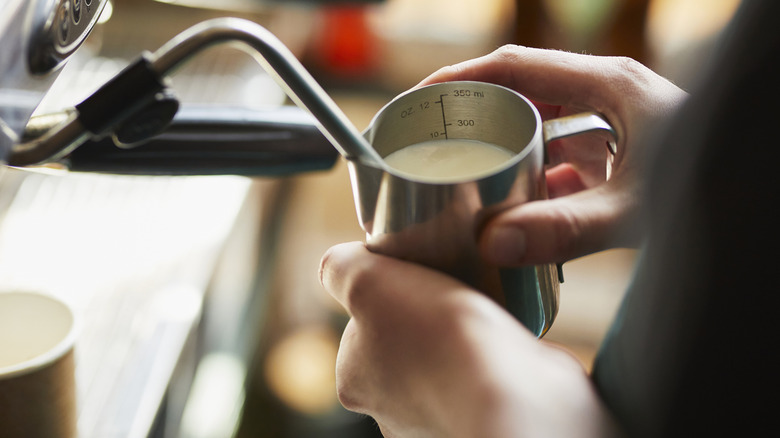
For a home coffee bar, investing in a quality milk frother, thermometer, and espresso machine is essential. (And if you like iced coffee, invest in a quality cocktail shaker next, too.) Once you have all the right tools, it’s time to make sure the milk comes out perfect.
Advertising
After the espresso, fill your pitcher with cold milk. Insert your milk frother into the pitcher and aerate the liquid for a few seconds until you hear a sound like tearing paper. Once you hear this sound, immerse the frother completely in the center of the milk pitcher until the liquid swirls around in a swirling motion. Continue frothing the milk until it reaches about 65 degrees Celsius. Now you can turn off the steam and remove the frother from the pitcher. Then tap the pitcher lightly on the countertop to mix the microfoam with the liquid. Voilà. Now you have high-quality, frothed milk that is perfect for a beautiful latte.
If you don’t want to waste milk while practicing, Mathew Woodburn-Simmonds advises “steaming water with a drop of washing-up liquid to create a foam similar to that of steamed milk.” You can then “pour this into water colored with food coloring. But don’t try to drink anything you’ve prepared.”
Advertising
Latte art also depends on the angle at which the milk is poured

While the temperature and consistency of the milk should be just right if you want to create the absolute best latte art, there are a few other techniques that pros like Mathew Woodburn-Simmonds swear by to ensure the art is truly perfect. First off, pouring the milk into the espresso is an important part of the latte art equation. “When you pour the milk, make sure your pitcher is perpendicular to the handle of the cup, so hold the cup with the handle facing east and pour with the handle of the milk jug facing north,” said Matt.
Advertising
Once the angle is just right, next pour the milk into the espresso. “Start in the center; this will gradually move your design toward the edge. If you start close to the edge, the milk may squirt out the sides.” While pros can do this effortlessly, beginners shouldn’t be afraid to take their time with the first few pours until they get the hang of it. Even for beginners, make sure to start with a good design. Some pros recommend starting with a basic choice like a simple tulip or classic heart shape. Once you have a design in mind, it’s time to steam.

:max_bytes(150000):strip_icc():focal(749x0:751x2)/drena-de-niro-leandro-rodriguez-070323-1-1f003693a7464280a92d90d71f38b27b.jpg "Robert De Niro’s daughter Drena honors late son Leandro on his 21st birthday")

